Now I normally do my toning in Manga Studio so hopefully I get this down okay in Photoshop
Toning in PhotoshopA lot of people like that manga style toning and tutorials for it are often requested on various art boards. So I'm going to show you guys how to do toning in a few ways by using Adobe Photoshop. This tutorial will require a basic understanding of Photoshop, feel free to back track and read my other Photoshop tutorials here if you are unfamiliar with layers and their functions.
The Easy WayThis first way is pretty easy and is what people like James do to tone. I personally don't use this method as it looks less authentic to me
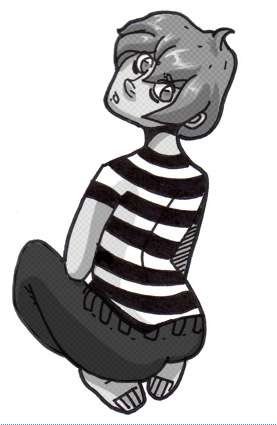
http://i139.photobucket.com/albums/q320/Corny63/Julianibw.jpgI'm using this lineart provided by Corny for this tutorial, feel free to use it as well if you like. Although I do recommend working with something that's a much higher resolution. Keep in mind that this way of toning is not going to work very well with an image at this resolution since resizing is what makes this method shine.

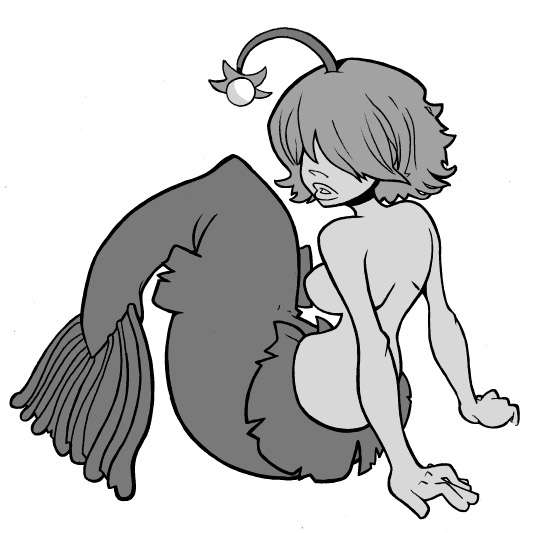
Create a new layer for each section like skin, hair, pants, etc. make sure they are all below the lineart layer with the lineart layer set on Multiply. Now fill in each layer with whatever grays you like.

Make sure for each layer you have the right color you'll be using as your foreground color prior to this next step. Now, here is one of the rare instances we are going to use a Photoshop filter, under normal circumstances these are FORBIDDEN but it's okay for this. Go to Filter - Sketch - Halftone Pattern. Make sure that it's set on Size-1 Contrast-0. After you do it once you can simply press CTRL+F to apply the filter to each layer, but again, you must have the proper foreground color selected or it's all going to be 1 tone.

Now you can stop at the above step or if you really want to make the tones better, create a new layer above all your current tone layers. Set this layer on Multiply. Now select a medium gray and simply paint in where you want the shadows. Since you already have the tones there, there's no reason to reapply the Halftone Pattern filter.
If you like, you can go onto the hair layer and simply delete areas to create highlights on the hair, you can do this on any layer you like really to make the toning a little shinier. And we're done!
The Slightly Harder WayFor this tutorial you are going to need high resolution lineart. If you don't have any lineart sitting around that you can scan, here are a few high res images you can practice on
http://zsabreuser.deviantart.com/art/Pothole-meets-Paprika-78486076Zsabreuser has provided some lineart. Simply hit the download option to get the 300 DPI file
http://smg.photobucket.com/albums/v154/Oldvwcamper/?action=view¤t=seance.jpgAn image provided by Kure Ji Ore
http://sukebu.com/tonepractice.jpgAn image provided by Mamoru
http://brograbs.dapshow.com/Images/Lineart/Several images provided by Lysol Jones
Now I personally use Manga Studio for all my toning needs, but this is essentially doing it the Manga Studio way but with Photoshop. The only reason it's a little harder is because you have to do a little work finding the tones.
If you need tones, I have done your homework for you and located some
http://dementedmonkey.deviantart.com/art/Digital-Tones-Pack-35558684 go here and download them. Once you have them downloaded, unzip the file and then load them in Photoshop. You can load them into Photoshop by selecting the Paint Bucket tool, choosing Pattern instead of Foreground on the top bar, clicking on the Pattern menu, and selecting Load Patterns.
Now again create new layers for each tone and fill them in like we did on the first part of the tutorial. Except this time you need to lock the transparency of the pixels right after filling in each layer. This is just so we can easily fill in each tone. And if you don't know what I mean by lock the transparent pixels, please revisit
http://entervoid.com/board/index.php?topic=9925.0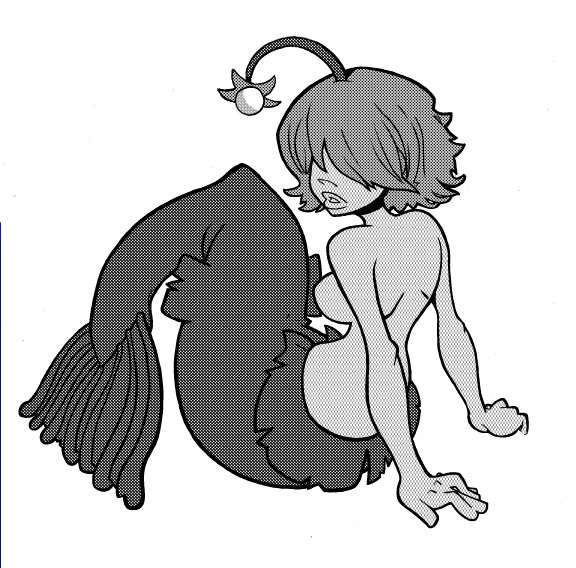
Now by using the Paint Bucket tool set on Pattern, feel each layer with whatever pattern you like from the tone packs. It will take some trial and error. If you can't get the tone of gray just right, don't worry, you can simply adjust the brightness by going to Image - Adjustments - Brightness/Contrast. If you're not working with a large resolution image, this step is going to look awful.

Now you can stop at the above step or create a new layer above your other colored layers and set it on Multiply. Use a medium gray and give your tones some shading. If you would like to add highlights anywhere, simply unlock the layers and delete where you want the highlight to be.


einsam
Colbitzer
@ 3:32 PM Apr 17th