Here are a few extra things too, that might help. It might get a little bit more complicated than Angie's so if you get lost, disregard & follow hers haha Like anything in photoshop, there's twenty ways to go about doing the same thing & this is a lot more clunky than the way above. but maybe someone might like it.
Getting A Balloon's Text To Maintain The Shape of the Bubble:Step One:
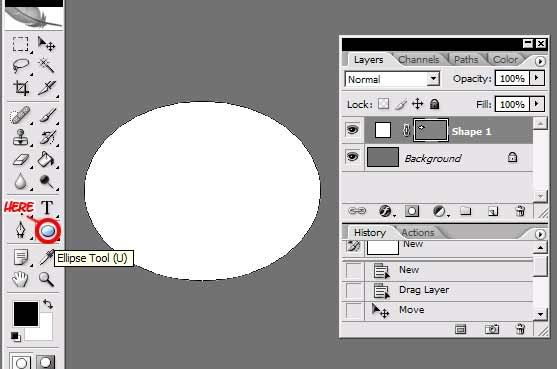
First, for this you have to use the Ellipse Shape Tool (as shown above). Create a simple white ellipse. Don't worry about the size right now, just ballpark it. But notice how in your layers, it creates a 'Shape 1' layer. This shape is a vector.
Step Two:
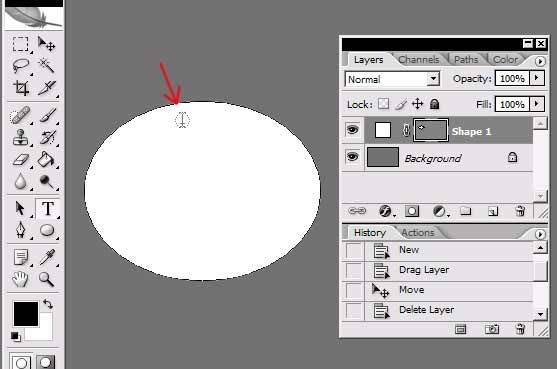
Assuming you followed Angie's advice & got Letter-O-Matic on your machine already, go to the Type Tool, the 'T' on the tools. Chances are you know what this does already. First all you need to do is make sure your text is going to be aligned to the 'Center' Easy enough. Now try waving it over that Ellipse you created earlier. Notice how those square edges round out? That's what you're looking for. Click the mouse, & you'll notice that no matter where you click over the circle, the text bar will show up towards the top center, creating a new text layer. Now type away whatever bit of dialogue you need.
Step Three:
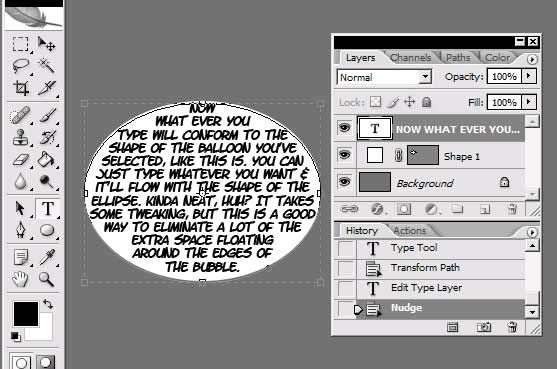
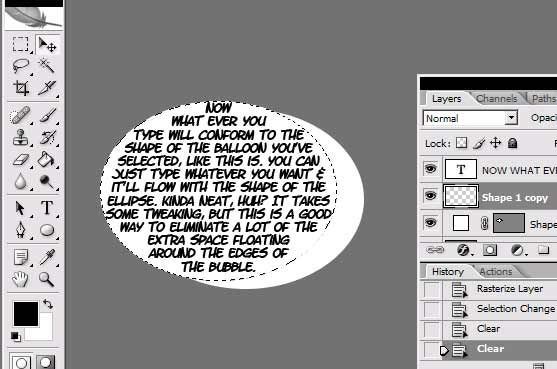
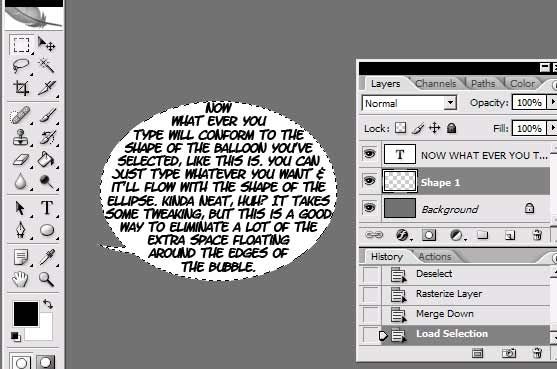
haha read the bubble above. See? Without ever having to hit 'enter' your text will automatically follow the mask of the shape layer below. now on that balloon i have the font set at like '11' at 72 dpi. it's smaller than you'll usually see, but whatever. and generally, you're not gonna want to use THIS MUCH type in a single balloon, but i did it to show how the text would fit the shape. you can use whatever size or typeface you want & it'll stay within the shape of the balloon on it's own separate layer. you may need to nudge to fit it just right. this one I didn't adjust it other than nudging it a bit, but you can also resize the balloon using the transform > scale. however, when you do that, unlike what it usually does to text, it doesn't actually change the size of the letters, just the shape of the bubble the letters fit in. you can do the same to the original shape layer as well. but it's important if you do resize the text layer itself:
Make sure that if you shrink down the balloon size, it doesn't start to CUT OFF the text! if you have more typed than can fit in the balloon, it'll just fit what it can & cut off the rest. if this is constantly a problem maybe consider a smaller font size to begin with? you can always adjust the font size as you normally would by selecting & changing the number, but make sure it's consistent throughout.
This would be easy to apply to Angie's Version as well. Just make an ellipse roughly where & the size you want it, click the type tool over top to get that shape, type the dialogue & be sure to delete the Original Ellipse Shape.
Creating a Cursor/Tail/Pointer With a CurlStep One:
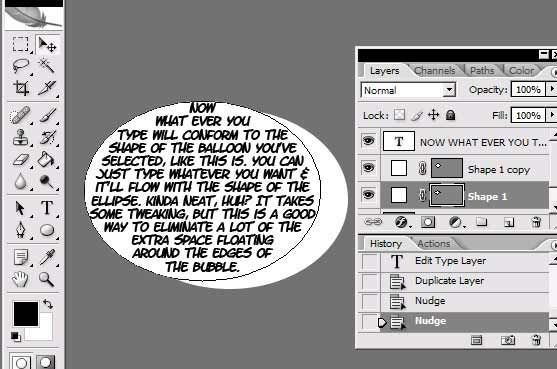
Alright so you have your Balloon, the text is in it, it's good to go. Now what about that little doohickey that points to the source of the noise? Angie's way is great & super easy! Me? I dunno, I like giving the cursor a bit of a curl on it. Just a goofy little effect. If you look at the image above, I selected the original Shape Layer (mind you, don't be like me, name your layers haha), & created a duplicate layer. Using the nudge tool, I shifted it over to the side & down a little bit. When you're doing it for real, think about the direction you want the cursor pointing. And if you want it facing left or right, nudge it in the opposite direction. judging by how thick or thin you may want your cursor, you might wanna consider scaling it a bit.
Step Two:
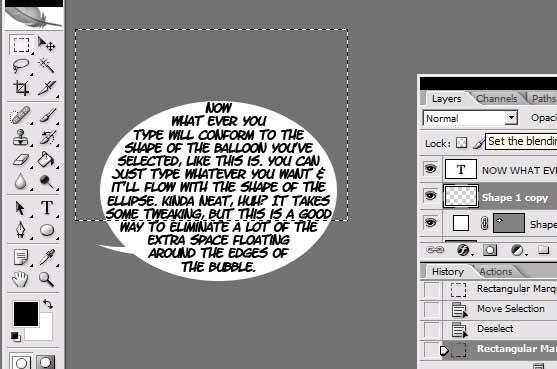
Right, so next select that new shape layer & right click, looking for that option 'Rasterize layer'. When you do that, it takes that layer out of the goofy vector mask state it was in & turns it into a regular old PS layer. Now keep that layer selected, but hold the 'Control' key & click the original shape layer. It should select that original shape as a marquis/dotted line. with the newly rastered layer still selected, just hit delete.
Step Three:
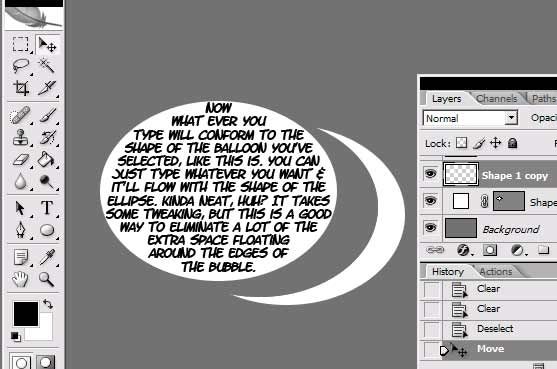
Now I moved it aside on here, but it should give you this 'crescent moon' shape. Mind you this is a little rushed as I didn't really have a source in mind.
Step Four:
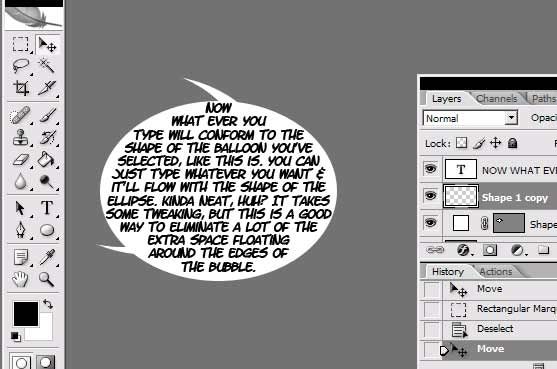
Move that shape over/under the balloon however you'd like. don't be afraid to rotate or whatever to get it just right. as for that other side that's sticking out the other end...
Step Five:
Just select it somewhere over the balloon & press delete. Voila. It gets that little goofy swoopy effect. Not that it mattered much. haha now...
Finishing UpStep One:
Your Balloon is Comprised of Three Layers: The Text on top, & then the cursor & the balloon. If you've got a bunch of dialogue on your page right now, three layers per bubble is gonna get nutty. So first off, make any last minute size adjustments. Like you did earlier, you're going to rasterize the balloon, and any resizing is good to do before hand rather than after the fact. So Resize, rasterize... Now select which ever layer you have on top, the balloon or the cursor. if you go under the 'layers' option up top, you should see 'merge layer down' clicking that should merge the two into just one layer, giving you the image i have up above.
Since the balloon, cursor & all is one layer now, you can add the outline here like in Angie's. Now this is completely optional, but beyond the black outline, sometimes i'll add an 'outer glow' on as well (see below). Pure White, Screen, spread & opacity up to 100%, & set the size up to just one more than whatever you set the black stoke too. If you have a lot of lines & line work or dark bits, adding that little extra highlight makes the balloon stand out a little bit. again not necessary, just something i do sometimes.
Step Two:
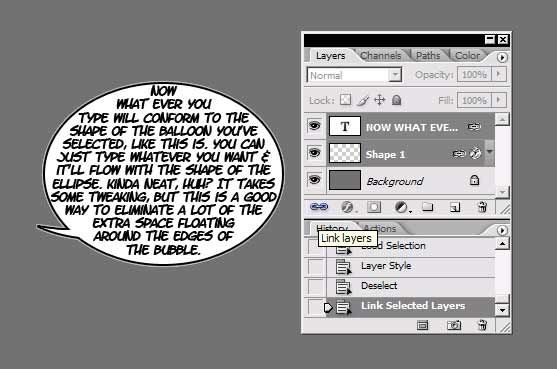
Right so now, it's down to two layers. you could rasterize the text & merge like you did the cursor, but let's say you don't like the wording & wanna change something. you'd be eff'ed as rasterizing the text would make it so you could edit. But Wanna keep them together anyhow? Later versions of photoshop have the 'Link Layers' Tool. In your layers window, select the text layer & hold shift (or control) to select the balloon layer (they should both be highlighted like in the image above) Now if you have one of the later versions of PS, you will notice a 'chain' icon at the lower right of your image. With the two layers selected, click it, & the layers should get that chain icon too. Now select just one layer & try moving it. It should move both. This goes for scaling & rotating too. if you want to unlink them at any time, select either layer & click the chain again to do that. but linking is a good way to keep things together while still allowing you to do some editing.
Hope this helps someone out there!
-J


99 Problems and a Cat
Croi Desai vs. HR99
@ 12:30 AM Apr 23rd